Kuro Daikon ♠ Black Radish Mina Weapon - 2
http://otakitty.blogspot.com/2011/10/kuro-daikon-black-radish-mina-weapon-2.html
 |
| photo by Orz_Phtogrphy |
I had been working on my weapon props for Ootsuki since earlier in this year, I had attemped to McGuyver my way into making these props with whatever I could find that could in some way resemble what I needed, yet the outcome to all my efforts resulted in this:

The original shape of the plastic cauldrons had warped because of the expanding foam, I couldn't really achieve a smooth surface with paper mache + primer + bondo, which ended up making the props much heavier than I had intended them to be. It was an all around failure T_T

As my luck would have it I met the talented Jessie Melero who has the most amazing workshop my eyes ever had the privilege to witness upon. O_O
Jessie was kind enough to take on a professional approach to making my weapons and I got to watch, learn and photograph this process.
Jessie has urethane foam of varying densities in his shop. My main concern was the final weight of the props, so the foam that was chosen is not very dense -therefore light- almost resembling the texture of a dried up sponge.
(click image for large view)

From a huge block of foam, the circumference of the props was drawn in and then two square blocks were cut from it.
After that the foam was cut with a knife to get a rough cylinder shape.
"It's as smooth as cutting butter" he said... Which is true, if you're not careful and cut your foam too hastily huge chunks will come off, since it is easily sliced.
(click image for larger view)

After this point, the center of the cylinder is marked and lines mark how much needs to be cut off to prepare for the sanding stage.
You can see my Ootsuki Mina figure next to the foam, and behind the stack of leftover foam that resulted from the initial cutting, this foam scraps will be great for some smaller props!
After the second rough shape was achieved, Jessie hand sanded those cylinders into submission with a crazy sanding rod/knife!
(click image for larger view)

The sanding knife still left some roughness, once the two pieces were closer to the final shape, they were further smoothed out with sanding paper.
Because of the it's low density, the foam has to be covered with fiberglass to give it a protective layer and smooth surface. Coats of primer and spot fixing putty (the red spots) finalize the smooth finish of the props.
Jessie used two coats of Design Master's spray paint for the color. This brand of paint dries very fast!
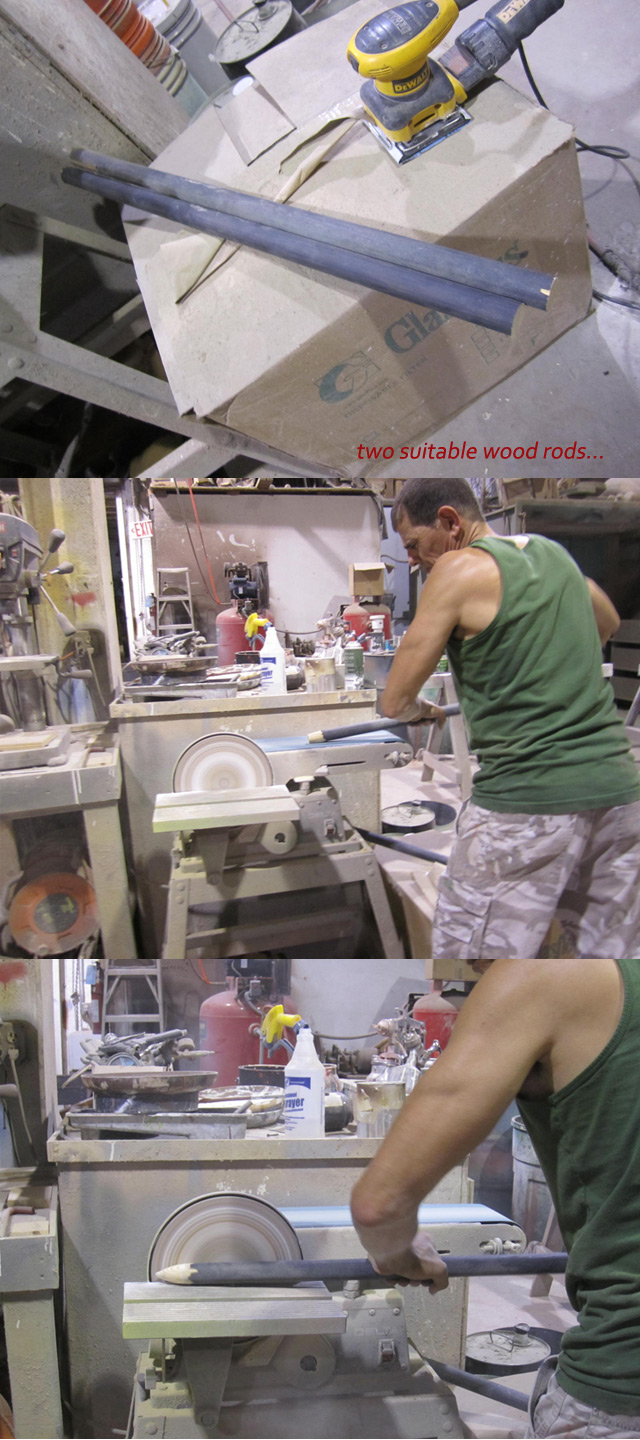
The rods were made out of two wood dowels Jessie had lying around, the tips were sanded down until the desired shape was achieved (which kinda resembles a stake and could be dangerous if you're not careful...)
The radish weapons have a small hole on the top where the rods are inserted and stay in simply with pressure. The bottom has a carved out area to insert the radish leaves.
 |
| photo by pgw-Chaos |
The radish leaves were made with green foamies and attached on a posterboard base that was then attached to the bottom of the radish using sticky velcro and later on hot gule as I became pressed for time.
The end result were some incredibly smooth and shiny looking radishes! Considering the large size of the prop each radish weighted about 3 lbs. which was much lighter than what I was making before.
The day of the shoot the Florida heat was on full power to make us all suffer and after about 3 hours of walking around and taking photos I was having a hard time keeping a grip on my weapons (cuz my hands were sweaty inside the gloves) or lifting them very high. I had to carry these props the entire time they were with me, since putting them down on a hard surface could chip the fiberglass or damage the leaves, taking all that into consideration (and the need to increase my arm strength...) I'm so glad they were relatively light!

.jpg)


.jpg)

